

📝 Blog Summary
This blog breaks down how outbound calling works on a FreeSWITCH VoIP server, from SIP trunk configuration and dial plan routing to initiating calls with the originate command. It also covers fs_cli monitoring and security practices to keep your setup reliable.
If you’ve been exploring telephony solutions or looking into how to configure a FreeSWITCH VoIP server, chances are you’ve come across FreeSWITCH. It’s a powerful open-source platform known for its flexibility and scalability in handling real-time communications.
But what if your goal is simple, just to make an outbound FreeSWITCH phone call?
That’s exactly what we’re covering today.
🗝️ Key Highlights
- FreeSWITCH enables seamless outbound calling through SIP trunk integration and smart dial plans.
- Proper FreeSWITCH VoIP server configuration ensures successful call routing and reliable connectivity.
- Monitoring and debugging tools, such as
fs_clicommands, help maintain call quality and system stability.
Let’s walk through how you could use the FreeSWITCH VoIP server to make an outbound call.
Don’t worry, we’re keeping it light on tech jargon and completely code-free. So even if you’re not a seasoned developer, you can still grasp how it all works.
Whether you’re building from scratch or looking to hire FreeSWITCH developers to get it done faster, this guide walks you through everything you need.
What is a FreeSWITCH VoIP Server?
FreeSWITCH is an open-source telephony platform that acts as the brain of your communication system. It handles voice calls, video conferencing, and messaging, all from a single, fully customizable server. Built for scalability, a FreeSWITCH VoIP server can manage everything from a small business phone setup to thousands of concurrent calls at a carrier-grade level. Unlike traditional PBX systems, it gives you complete control over how calls are routed, processed, and secured, without the hefty licensing costs.
Whether you’re running a call center or just need a reliable VoIP solution with FreeSWITCH, this is your go-to platform.
What sets FreeSWITCH apart is its modular design. This means you can plug in only the features you need, making it ideal for customized setups, especially if you’re considering using FreeSWITCH to enhance outbound VoIP.
Did You Know?
FreeSWITCH was born to go beyond Asterisk. FreeSWITCH was originally developed by former Asterisk developers who wanted a more scalable, flexible alternative. It was designed from scratch, not as a fork, to support more complex call flows and modern VoIP features.
What Do You Need Before Making Outbound FreeSWITCH Phone Calls?
Before we jump into FreeSWITCH call routing for outbound calls, let’s make sure we’ve got our bases covered:
1. FreeSWITCH VoIP Server is Installed and Running
First things first, you need a FreeSWITCH VoIP server up and running. Whether it’s on a cloud server (like AWS, DigitalOcean, etc.), deployed via FreeSWITCH Docker, or on your own local machine, make sure the installation is complete, and the service is active. FreeSWITCH’s official documentation offers great step-by-step installation guides for various platforms.
2. Command-Line Interface (CLI) Access via fs_cli Commands
You’ll need to be comfortable accessing FreeSWITCH’s CLI using fs_cli commands. This is your primary control panel for interacting with the system in real-time. From checking logs to reloading configurations and testing dial plans, fs_cli is where most of the action happens during development and troubleshooting.
3. FreeSWITCH SIP Trunk or VoIP Provider Account
To make outbound calls to the PSTN, you need a FreeSWITCH SIP trunk or an account with a VoIP provider. Think of this as your virtual telephone line that connects your FreeSWITCH VoIP server to the outside world. Many providers, like Twilio and Flowroute, offer flexible SIP trunking services for telecommunications.
4. Basic VoIP and FreeSWITCH Call Routing Knowledge
Don’t worry! You don’t need to be a telephony expert. But having a basic idea of what VoIP is, how FreeSWITCH SIP works, and how dial plans function within FreeSWITCH will make this journey smoother. If terms like “context,” “extension,” or “gateway” sound unfamiliar, we’ll break them down as we go.
How Do You Set Up a FreeSWITCH SIP Trunk for Outbound Calls?
A FreeSWITCH SIP trunk is like your virtual phone line. It connects your FreeSWITCH system to the public telephone network.
To get started, you’ll need a SIP trunk from a VoIP provider. This includes:
- Server address
- Username and password
- Preferred codecs (these handle how audio is transmitted)
This is a vital part of your FreeSWITCH VoIP server configuration and one you can’t skip when planning outbound call setup.
Setting Up the FreeSWITCH SIP Trunk for Outbound Calls
A FreeSWITCH SIP trunk is like your virtual phone line. It connects your FreeSWITCH system to the public telephone network.
To get started, you’ll need a SIP trunk from a VoIP provider.
This includes:
- Server address
- Username and password
- Preferred codecs (these handle how audio is transmitted)
This is a vital part of your FreeSWITCH VoIP server configuration and one you can’t skip when planning outbound call setup.
Configuring FreeSWITCH Call Routing with Dialplans
This is where outbound routing actually happens. A dial plan is essentially a set of instructions that powers FreeSWITCH call routing. It tells FreeSWITCH what to do when someone dials a number.
For example, if a user dials a number starting with “+1”, the dialplan might say: “Send this through our FreeSWITCH SIP trunk.” This is the heart of outbound call routing, where you define conditions (like number patterns) and actions (like where to route the call).
Think of it like setting up a GPS route: the dialplan is your navigation system.
Registering Your FreeSWITCH SIP Profile with a VoIP Provider
This step ensures that your FreeSWITCH VoIP server’s outbound calls are authorized to go through the provider. Just having credentials isn’t enough; your server must register its SIP profile with the VoIP provider to be recognized.
This process tells the provider, “Hey, I’m here and ready to make calls!”
Keep an eye out for registration errors. If your FreeSWITCH VoIP server isn’t properly registered, your outbound calls won’t reach their destination. It’s like trying to board a plane without a ticket.
Initiating an Outbound FreeSWITCH Phone Call Using the Originate Command
Once everything is set, it’s go time.
FreeSWITCH uses the originate command to trigger outbound calls directly from the CLI — making it easy to test and automate phone calls without a frontend. Here’s what happens when you initiate a call:
- FreeSWITCH reads the dial plan to see where the number should go.
- It checks the SIP profile and sees which gateway (or SIP trunk) is available.
- If all is well, it dials out through the SIP trunk to reach the destination.
This seamless process is what makes FreeSWITCH so efficient for outbound calls.
💡 Did You Know?
Supports thousands of concurrent calls. With the right hardware, FreeSWITCH can handle thousands of concurrent calls. That scalability is one of the reasons it’s used in large call centers and carrier-grade systems.
Monitoring Calls with fs_cli Commands in FreeSWITCH
Even the smoothest setups can hiccup. That’s where monitoring tools and logs come in.
Using FreeSWITCH fs_cli commands such as sofia status, show calls, and console loglevel debug, you can monitor live call activity and quickly catch issues. Whether it’s a failed call attempt or a misconfigured dial plan, the logs will tell you.
If you’re testing how to make an outbound FreeSWITCH phone call and nothing’s happening, fs_cli is your first stop for troubleshooting.
Security Best Practices for Your FreeSWITCH VoIP Server
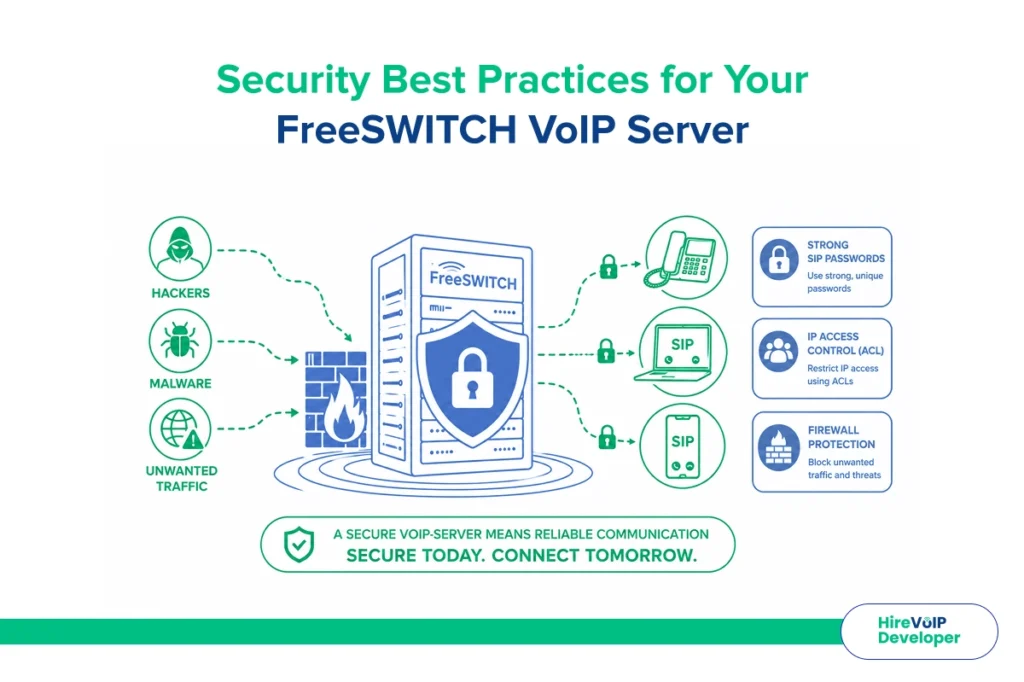
Let’s talk safety. An open FreeSWITCH VoIP server is like an unlocked front door.
To secure your FreeSWITCH call setup:
- Use strong SIP passwords.
- Restrict IP access using ACLs (Access Control Lists).
- Implement a firewall to block unwanted traffic.
These steps help prevent unauthorized outbound call attempts from the FreeSWITCH VoIP server, which could rack up hefty charges.
Wrapping Up
From understanding dial plans to ensuring your FreeSWITCH VoIP server is securely registered, making a FreeSWITCH phone call isn’t as complicated as it looks . Once you get the hang of FreeSWITCH call routing, you’ll find it a robust and reliable way to manage all kinds of telephony needs.
Whether you’re just curious or planning to deploy your own solution, whether bare-metal or via FreeSWITCH Docker, hopefully, now you feel a bit more confident in how to make a call from FreeSWITCH. Keep an eye on your logs, use fs_cli commands to debug, and test often.
Hire a VoIP Developer to help businesses seamlessly set up FreeSWITCH VoIP servers for outbound calls by configuring SIP trunks, dial plans, and VoIP provider integrations. Their expert team ensures smooth FreeSWITCH call routing with secure, scalable, and customized solutions tailored to your needs.